Jewelry by Mirinda: Welcome to my blog on life and creativity

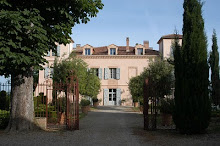
Blog photo courtesy of photographer Barbara Tyroler

Monday, April 21, 2014

Time and Tide Wait for No Man - or Woman

Has it been nearly two years since I wrote in my blog?  How boring of me.  What have I been doing in the past couple of years?  Well, I've been making jewelry, of course, and working as a member of FRANK Gallery in Chapel Hill, NC, one of the area's best art galleries. (I'm by no means the only one who thinks so.)  But most important, I've been taking care of my granddaughter, now three years old, one day a week.  Watching her grow and acquire impressive language skills has been a deeply satisfying experience.  This is Clara with me in our Halloween wigs.


Back to jewelry:  In addition to my line of fine silver jewelry, I've been working on pieces using recycled materials - vintage sterling pieces, antique bottle caps and other bits and bobs I find in thrift, consignment and antique stores. I love giving old, neglected pieces a new life. Here are a couple of examples.  The first piece pictured is fashioned from the sterling lid of an antique miniature teapot. One of my FRANK colleagues gave me a box of old sterling silver pieces his mother had collected over many years.  This teapot lid was without its base and its spout was missing, so with a little sawing and filing, I turned it into the centerpiece of the necklace. In its new incarnation, it looks a bit like a sea urchin!


This pair of earrings sports the tines of a sterling serving fork, with my own fine silver post tops.


Thursday, October 25, 2012

It Looks Like Enamel But ...

IT'S ACRYLIC PAINT! After going back again and again to Golden Paints and other tutorials, I taught myself to make acrylic skins.  What, you ask, is an acrylic skin?  Well, it's acrylic paint and a pouring medium that you pour onto a substrate like butcher paper so that when the paint dries, you can peel the "skin" off the paper, and what you have is acrylic standing on its own, all by itself, crying out to be, if not on a canvas, part of something.

I was pleased with my first try at pouring an acrylic skin; the colors were beautiful.  There was only one hitch, I couldn't peel it off the plastic backing I was using (next time, butcher paper).  Not to be deterred, I used the paint with the plastic backing it was dragging along and put a section of it inside a large PMC pendant I had made - based on a template from Gordon Uyehara's useful book, Metal Clay Fusion.  (Photo on upper right.)

Eureka, it looks like enamel!  I used another bit with a smaller pendant, and it took like a champ to being riveted as part of an acrylic sandwich between two pieces of metal clay (photo on right below). I'm hooked.  I see many more and varied acrylic skins in my future, to use not only with jewelry but also with my mixed media pieces.  Stay tuned.

Saturday, September 22, 2012

Pushing the Envelope

Le Jongleur by Mirinda Kossoff
For moi, the fall season (and Christmas will be here before we know it) is promising to be busy - both with jewelry and mixed media work.  I've been experimenting with combining the two; both are abiding passions without which I wouldn't be me.  I'm finding this new exploration to be both fun and fulfilling, regardless of the end product.  I try not to focus too much on outcome, because it's the process that's most important.  If the process is right and my heart is in it, the end product will be satisfying.  And I hope others will find it so as well.

Here's a new mixed media piece that resulted from just playing around with various gel mediums and acrylic paints.  As I worked, using some sgraffito, the colors and layers suggested shapes and forms, which then suggested the title:  Le Jongleur, which is French for "The Juggler."  Working intuitively allows stuff to bubble up from my unconscious, and I find there's playfulness in that place - as well as the darker stuff.  I suspect that the juggler image came up because I juggle jewelry along with my mixed media work, along with being an adoring grandmother, wife, reader, writer and traveler.  I love all the special people and activities in my life.  Working everything in sometimes is a challenge.  I need a 48-hour day.  The ones I have go by all too quickly.  When I'm absorbed in making a jewelry piece or other art, I have no concept of time, and when I come out of my state of flow, I find that time has fled.  That's a good space to be in.

I'm playing around with patinas on copper and finding other new materials for jewelry, since the price of silver is going back up again.  In the earrings shown here, I patinated copper donuts that I had cut out and then sandwiched a graphic ad from an old Ladies Home Journal between the two copper donuts.  I riveted the pieces together with brass rivets.  The vintage paper is preserved with resin.  I'm hoping to do more of this with my jewelry.  The prospect is intriguing, like visiting a new country.

Will a juggler reappear in my next mixed media piece, or abstracted in a piece of jewelry?  Maybe.

Wednesday, August 29, 2012

Transformation; One More Iteration of the Jewelry Pendant

Well, I thought the cyanoacrylic adhesive would work just fine for affixing my patinated copper donut to the fine silver "drum" back. (See previous post.)  My husband and I were in Manhattan, I was wearing my pendant, and we were walking around Nolo and the East Village, when at some point I looked down and noticed the copper top was off my pendant.  Alas and alack!  Where did it fall off?

We searched around the tiny Thai restaurant where we'd eaten lunch and the upscale consignment store where I tried on a few things (but bought none).  Nowhere to be found.  That night as I was undressing for bed, I peeled off my bra and there it was - the copper top.  My modest decolletage had trapped it.

To avoid having a pendant malfunction again, I cut out a larger copper donut, created a nice rich patina and then drilled holes for tiny brass screws.  Fortunately, the rim of the drum was just wide enough for a small drill hole.  That'll keep the thing on.  And I like the result in this 6th - or is it more? - iteration of the original pendant I made in Celie Fago's polymer clay and PMC class.


From the pendant on the left to the above right pendant in six pain-in-the-neck steps that were each a learning experience, or at least that's what I tell myself to justify the time it took to get to my vision for the piece.

Tuesday, July 10, 2012

Transformations: Jewelry Design Evolution


Apologies to any of you who've come to my blog only to find that I haven't posted in almost a year.  So, I'll just start with the recent past:   In late June 2012, I attended the final ever PMC conference near Cincinnati.  I say the final conference, because the PMC guild is folding, much to the dismay of all of us who've relied on its information and biennial conferences that provided useful information and the opportunity for bonding with other PMC enthusiasts.  Fortunately, Rio Grande is taking over the guild's Website and fund of information.  Already, there are agitators pushing for a new organization.  Kudos to you!

In my own world of working with PMC and sheet metal, I sometimes finish what looked like a good design in the formative stages and see at the end of the process that I've birthed an ugly baby.  I've learned that there is challenge and opportunity in my ugly baby:  the challenge of figuring out the mechanics of making changes and the opportunity to make a better piece.  Sometimes a piece sits around for quite a while before the lights go on and I realize what my piece needs in order to be finished.

The first piece below I made in a Celie Fago workshop on combining polymer clay with PMC.   The resulting piece met all the qualifications but to my eye didn't look quite right.  Celie gave us templates and direction for working on the pieces, so they all turned out similarly.  Mine, however, didn't nearly approximate the beauty of Celie's original, and honestly, I didn't want to make a copy of Celie's work.  I needed to own the piece as mine - my design.  So I took out the polymer clay insert and was left with a hole that needed filling.


The piece went through five iterations but unfortunately, I didn't photograph the middle two.  My first attempt, which you can see below the original, was to attach a copper disk with a fine silver design screwed on top.  I didn't like it.  Something about the hangy down thingy of PMC and copper just wasn't doing it for me.  I got rid of that during another attempt to fill the void left by the polymer clay by loading it with tiny labradorite beads and then making a shadowbox (done by adding a lid with a center hole).  The only way to affix the beads was to use cyanoacrylate and the result looked blobby, like gooey caviar, so I burned out the adhesive (outdoors and using a mask to filter the fumes) and of course ruined the gemstones.

So, once again, I'm looking at a hole inside the lovely PMC "drum."  I think for days about how to fill it.  I decide, finally, to use pieces of a sea urchin shell that I'd saved for years.  I needed to figure out how to hang the pendant, since the original was hung from a sterling wire that went up through the polymer.  I decide on a simple bail and solder the bail I'd fashioned onto the PMC.   I patina some copper and cut out a donut, then solder it to the PMC back (not easy since the copper requires a higher temperature for soldering).  My little butane torch just can't do the job:  the top comes off, hanging by tiny solder thread.  So I affix it with cyanoacrylate adhesive.  Then I slip the sea urchin shell inside with some additional adhesive.  The last iteration has the organic look I was going for.  Here it is below the first two iterations.  I learned something through each stage of this pendant's transformation, so the time and effort was worth it.

Do you prefer one of the earlier iterations of the piece?  If so, why?  Or do you agree with me that the last transformation is the best? (The last photo is the back of the piece.)


Sunday, April 3, 2011

Babies, Babies

I've been AWOL from the blogosphere since last fall.  Apologies to anyone who might have visited and come away disappointed (though that could happen even if there HAD been a blog entry). 

I've been making jewelry but less productively than usual.  And, disappointingly, the Chateau Dumas workshop did not fill up quite enough for me to give the week-long class this summer, along with veteran PMC teacher Janet Harriman.  We're hoping to make it happen next summer, maybe with a few twists to appeal to the French and British, as well as Americans.  We're going to add bronze clay for sure.  Stay tuned for Chateau adventures 2012.

My biggest news, and the event that has rendered everything else pale by comparison, is the birth of my first grandchild, my darling little Clara Jean Danser who is now more than two months old.  When I'm holding this newly minted human being with the silky skin and the sweet smell, the rest of my world falls away, and she completely fills the screen.  What can I say?  I've become another besotted, adoring grandmother who thinks her grandchild is the most beautiful and intelligent (yes, at about six weeks, Clara started smiling in response to our smiles) in the universe.

I'm working on a fingerprint pendant for Clara's mommy Shelley, my lovely daughter-in-law.  I'll design the PMC pendant and inscribe Clara's name with a new lettering kit I ordered from Cool Tools, and then I'll get a fingerprint on another piece of clay to add to the base pendant.  I'm still working out the design but I have the process down.  I'll post a photo when it's finished.


                                          Here is Clara at her two month birthday!
 

Friday, October 1, 2010

Curses, Foiled Again by HTML

Okay, so I thought I'd add Barbara Tyroler's beautiful photo to my Website home page.  Piece of cake, right?  Turns out to be a quagmire of code that I cannot bend to my will.  Even though I didn't make the change go live, it somehow got there on its own.  Now the home page banner is askew and not lined up with the rest of the page. What you see above is what I want, but Dreamweaver doesn't want it and has woven me a nightmare. Help!  After hours of trying, I cannot fix it, nor can I take it back to its original.  I need an HTML genie.  Really.